If you don’t want to keep paying Adobe, switch to Gimp. Here’s how to make Gimp have a very Photoshop-like user interface with PhotoGimp.
The creative industry is a big user of Adobe’s Creative Cloud, which is a staple in production houses and studios around the world. Photoshop is one of the many tools contained in this package and is widely used in the fields of design and photography.
However, while the world runs on Photoshop, not everyone wants to continue paying a hefty monthly fee to access the entire package. In fact, even the subscription for just one app is a bit expensive.
Users who wish to opt out of their Adobe subscription should seek alternative options. There are certainly many of them out there, but it reveals a whole new problem.
If you switch apps, you need to learn how to use it.
Sure, on Mac and iPadOS there are Procreate, Pixelmator Pro, and many other art tools to purchase and use, often at a lower cost than Adobe packages. If you switch, you face a period of time where you have to relearn what you could do in Photoshop, but in a completely different user interface.
Then there’s the sheer number of keyboard shortcuts that seasoned Photoshop pros will have dedicated to muscle memory. Many shortcuts, especially those for rarely used functions, will be different.
It will take time to get back up to speed, which for some may be too high a cost to switch from Photoshop.
Bring out PhotoGimp
PhotoGimp is a potential answer for people who want to switch to completely free Gimp, referring to the GNU Image Manipulation program.
In addition to having a funny name, Gimp is a free, cross-platform image editor for use on macOS, Windows, and Linux. While it’s a powerful tool, it’s also open source, so you can check and modify the source code if you want.
Although it is free, this attractively priced software has the same problem as the others, in that the interface is different from Photoshop. All of the icons are in different locations than the typical Photoshop layout, which means you’ll have to take some time to learn where everything is.
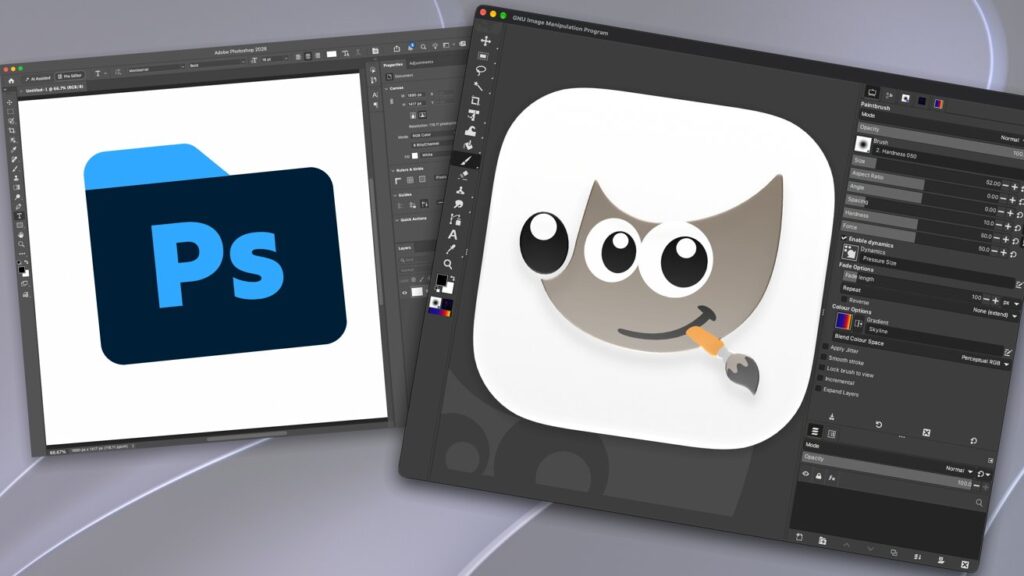
The default Photoshop layout [left]PhotoGimp’s reworking of the Gimp interface [right]
PhotoGimp, on the other hand, solves this problem by being a patch for Gimp. Specifically, one intended to be used by Photoshop users.
Instead of learning a new interface again, PhotoGimp changes the interface for you instead. While it’s not necessarily a 1-to-1 match with Photoshop, it reconfigures Gimp so that the layout and tools are positioned to mimic Photoshop’s placement.
But it doesn’t stop there, as it can also perform keyboard shortcuts. The shortcuts in the PhotoGimp patch match those of Windows Photoshop users, except that it maps the use of the Windows Control key to Command.
To be clear, this doesn’t suddenly turn Gimp into a perfect copy of Photoshop. What the patch does is reduce the time it takes to search and relearn the interface, but it won’t change how Gimp functions actually work.
It’s not a silver bullet, but it helps bridge the knowledge and muscle memory gap.
How to use PhotoGimp to make Gimp more like Photoshop on Mac
The process is relatively simple, but requires access to the Application Support folder within the Library in your Mac’s user directory.
After installing Gimp, immediately take a backup of its folder in Application Support, as PhotoGimp replaces many files in it. You can always uninstall Gimp and start from scratch, but making a backup of the folder would save some time and effort.
The installation process of Gimp for Mac
- Download and install Gimp from the official website. Use the latest stable build, for both Apple Silicon and Intel Macs.
- After downloading, open DMG, then in the window drag Gimp to the Applications folder.
- Run Gimp from the Applications folder and ask Gatekeeper to open the app you downloaded from the Internet. Once started, which is necessary for PhotoGimp to function, close Gimp.
- Download PhotoGimp from GitHub and extract the zip file.
- In a new Finder window, open your user folder, then /Library/Application Support/GIMP
- Note the version number of the folder in it, for example 3.2. Copy that folder and save it elsewhere as a backup.
- Rename the extracted PhotoGimp folder to match the Gimp folder. So if your Gimp folder is 3.2, change the name of your PhotoGimp 3.0 folder to match.
- Copy the renamed PhotoGimp folder and paste it into the Gimp folder of the same name. When asked about existing files, select “Replace” or “Merge.”
- Open Gimp.
If the patch has been successfully applied, you’ll see a different loading screen for PhotoGimp, followed by a fairly familiar layout.
At this point you can proceed by trying a free alternative to Photoshop, without having to think too much about finding the main tools and features.